I thought I'd write about my experience producing biochar. It seems that not many people know what biochar is. I've mentioned to many people that I've been making biochar, and have received blank looks or questioning replies in return. Only a few I've mentioned it to knew what I was talking about.
I haven't been producing biochar primarily to sequester carbon, though it is an added benefit. I've been producing it to use as the base layer in some
wicking beds which I've built in the front and back yards of my sharehouse in Northcote. Normally wicking beds contain a base layer of gravel, scoria, sand, screenings, or some kind of course aggregate which water can freely move between. I think biochar will fit this purpose even better than rocks, since it will provide an environment suitable for harbouring micro-organisms; it will retain more water; it is lighter to transport; it will reduce weight in the planter box; it is free to obtain and/or produce; and as I mentioned before, it's a means of carbon sequestration. Further, if I deconstruct my wicking beds for whatever reason, the biochar can be mixed in with soil or compost and used in the garden to promote plant growth. Also it's fun to produce, which is what I'll be talking about in this post.
Biochar can be produced from any type of biomass using a process called "pyrolysis". This simply means heating the biomass to temperatures above 400 degrees Celsius in a low- to no-oxygen environment. Once this occurs, the biomass will start pyrolysing, and release a gas called "syngas", as well as "bio-oil", both of which are flammable. This fact can be used to design a retort so that the bio-oil and syngas are burned to further heat the biomass and keep the process going. This will be clearer once I explain the set-up I used, below. You can also read about the process in more detail on
Wikipedia or elsewhere.
This set-up is called the "Simple Two-Barrel Method". It's one of the simplest set-ups to produce biochar using pyrolysis (you can also grab charcoal from any old fire and it should serve the same purpose, though maybe the total surface area of biochar from a fire would be slightly lower than it is from pyrolysis). I was able to find the materials I needed just searching around at home.
The set-up was first described to me by a friend, Caleb, at the Students of Sustainability Conference at Flinders Uni in July 2015. Caleb was WOOFing at Agari Farm and using their biochar retort there. So he ran a workshop at the conference. It was a shame that there were only five of us at the workshop, given the lack of awareness about biochar and it's potential widespread use!
I also briefly looked up some online resources for producing biochar while I was setting up, to make sure I'd got the concept right and to improve my set-up. In a nut-shell, all you have to do is fill a smaller drum with biomass, turn it upside down, inside a larger drum, pack wood and kindling between the two drums, and light it! I've outlined these steps in more detail below.
1. Find/obtain a metal drum which is closed at one end - this will be used to contain the biomass you wish to pyrolyse into biochar. For this, I've used a 60 litre steel drum.
 |
| Dad punching out one side of a 60 litre drum to use in the biochar retort. |
2. Find a larger drum which is about 200 mm larger in diameter and at least 100 mm taller. For this I used the ubiquitous 44 gallon drum. This combination of drums seems to work fairly well, though I've limited experience with other sizes. I initially tried a smaller 20 litre drum for the internal drum, but the gap between the two seemed a bit large and I think the heat transfer between the two was less efficient. However I have had good success with a 20 L and 60 L drum combination. The drawback of using the 20L drum for the internal drum is that you produce less biochar compared to the 60 L drum.
Whatever the drum combination, the larger drum should contain air holes at the base to enable sufficient air/oxygen to enter.
 |
| The 44 gallon drum on the right, and the 60 L drum turned upside down on the left. |
3. Obtain biomass which you wish to convert into biochar, and pack the smaller drum full. Dry wood works better than green or wet wood (the process occurs faster), but you can throw in any kind of biomass, from orange peel to bones.
 |
| The 60 litre drum filled with cut pine logs. |
4. Set up a base for the drums to burn on. I used one layer of bricks for the 44 gallon drum, and a second layer for the 60 litre drum to raise it slightly, as well as a steel plate.
5. Turn the smaller drum upside down on the base you've created for it (this could be the base of the larger drum).
 |
| The 60 litre drum packed with timber and turned upside down, ready for the 44 gallon drum to be placed over it. |
6. Place the larger drum over the smaller drum such that it's sides are equidistant from the internal drum around the circumference. A closed larger drum would work fine too, in which case you would just place the smaller drum upside down inside the larger drum, with its base on the ground.
 |
| The 60 litre drum inside the 44 gallon drum. |
7. Pack the space between the two drums full of wood and kindling for burning, as well as above the internal drum.
 |
| Wood for burning packed between the two drums. |
 |
| Wood and kindling added on top of the drums. |
8. Light the material at the top of the drum and allow it to burn down. After about 20 or 30 minutes the biomass inside the internal drum should be sufficiently hot to start pyrolysing, and produce bio-oil and syngas. These products will escape out of the base of the internal drum and ignite, with the flames rising up between the two drums, further fueling the fire and transferring heat into the internal drum to keep the pyrolysis going. It should be apparent when this starts to occur, as the fire becomes hotter, with very little smoke and with a distinctive roar of the gas escaping out the bottom and igniting.
 |
| Lighting the biochar retort from the top. |
 |
| The biochar retort firing up and burning down from the top. |
9. Continue adding wood and stoking the fire between the two drums to maintain heat in the internal drum to allow the pyrolysis to continue. I had read on another site outlining this method that the pyrolysis process only took 30-40 minutes. However, my experience has been that it can take substantially longer, anywhere from two hours and twenty minutes (with dry biomass and a hot, well-stoked fire), to as long as six hours (with heavy, large, green biomass and a cooler fire), for these sized drums.
 |
| Pyrolysis in progress, with a 1.25 kg Milo tin containing extra biomass also in the mix. |
10. Once the pyrolysis has ceased, and all of the biomass inside the internal drum has turned to biochar, I tend to extinguish the fire by pouring water on it, so that I can also collect the charcoal from the fire to add to the biochar collection. Allow the internal drum to cool for a maybe an hour.
Alternatively you may just let the fire burn out, or even keep it going - nothing further will happen to the biochar inside the internal drum, provided it is sufficiently well sealed. However, if there is oxygen getting in, the biochar inside may start smouldering.
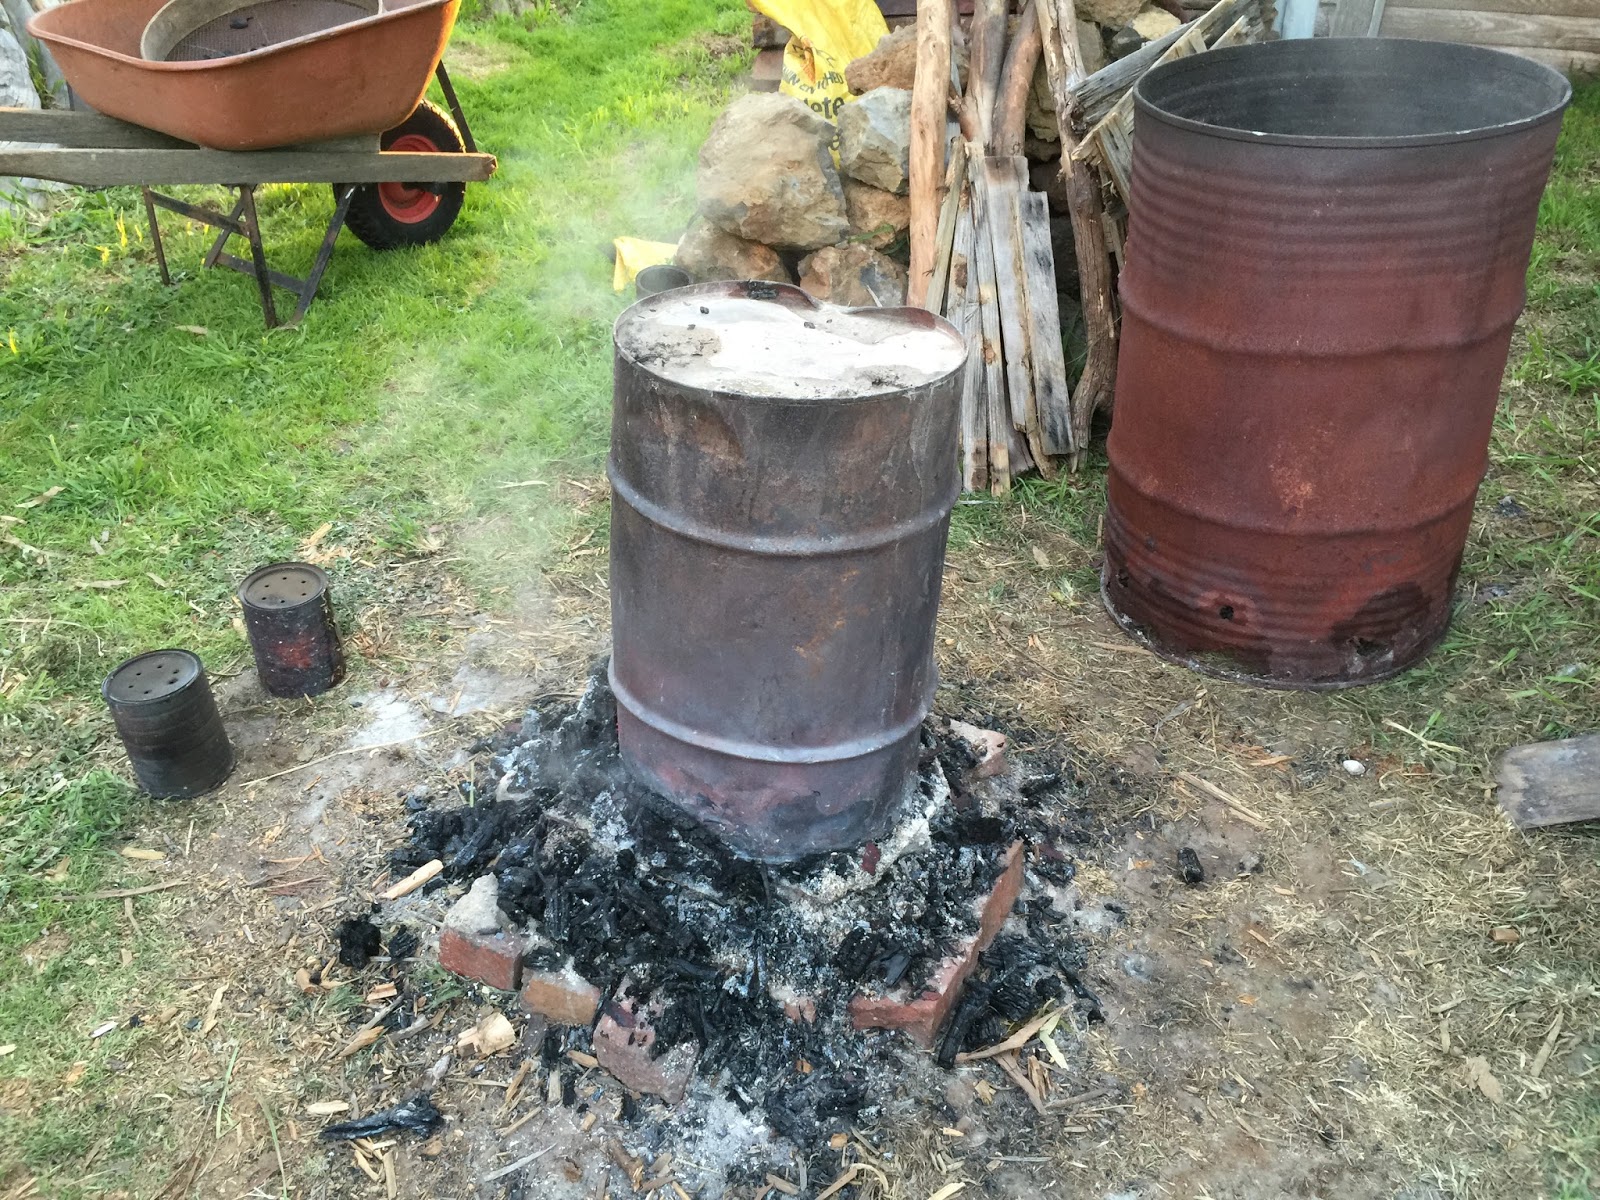
 |
| The pyrolysis has finished and the fire is dying out. |
 |
| Biochar being used as the base layer in my wicking beds. |
If you're planning to use biochar in the garden, you should inoculate it with micro-organisms and nutrients first, otherwise it may suck them out of the soil/garden that you add it to. This can be done by adding it to your compost heap, weeing on it, or soaking it in worm tea or a liquid fertiliser, for example.
The method above is quite a "rough and ready" solution to producing biochar. It seems to me that the design could be a lot more efficient. The drums put out a huge amount of heat, and one of the principles of permaculture is "no waste". With a better design, this surplus heat could be directed back into heating the biomass more efficiently to continue the pyrolysis, and some of the bio-oil and syngas could be captured for other uses. Alternatively, the heat could be put to another use. You could lay a grate and cook on top of the drum, or sit a pot of water if you need hot water for anything (e.g. a bath). Or just set it up on a cold night or during a party and stand around the fire to warm yourself. I actually find the fire quite entrancing, and am often content just watching it for extended periods. Maybe that's just an innate human quality?
I think biochar has a lot of potential for benefit, for both soil improvement and reducing carbon dioxide in the atmosphere. Wherever biomass is currently burned, such as forests or the waste biomass from logging, it could instead be turned into biochar. This could be done for little cost, and produce useful commodities which could be sold on the market. Farmers could then buy the biochar and plough it into their paddocks. Done on a large scale, this could both reduce carbon dioxide emissions and sequester carbon from the atmosphere.
As for local-scale applications, farmers could produce biochar instead of burning bonfires, for example. People that burn wood to heat their homes could replace their standard wood heaters with a pyrolysis set up, which would both heat the house, and produce biochar for the garden, or to be sold. Mobile biochar retorts could be available for whenever someone wants to dispose of larger amounts of biomass, or produce biochar.
There could even be applications in generating electricity using gassification of biomass. Syngas could be captured and used to replace natural gas. According to
Wikipedia, "pyrolysis may be the most cost-effective way of electricity generation from biomaterial." I've also read that the bio-oil produced in pyrolysis is useful for producing certain types of chemicals, and that it has an energy content of approximately 55% of that of diesel, and can be used as a kind of bio-diesel. Some of these industries already exist, and biochar is already produced on an industrial scale in some places. I think there should be incentives for such industries which have benefit for the environment, such as a carbon tax/emissions trading scheme. But hey, I'm starting to get carried away.
In the meantime while our capable politicians sort that out, why not produce your own biochar? The simplest way to do it is to grab an empty Milo tin or similar, punch some holes in the lid, fill it with biomass and throw it in a fire (e.g. the wood heater) for an hour or two, and you'll have some biochar!
 |
| A biochar retort using a 60 litre drum and a 20 litre drum in my back yard in Northcote. |
 |
| A biochar retort using a 60 litre drum and a 20 litre drum in my back yard in Northcote. |
|
 |
| Before: a 20 litre drum filled with biomass - hardwood timber beams cut to length. |
 |
| After: the same 20 litre drum after pyrolosis, now containing biochar. |
 |
| Cooking up some corn on the cob in a wok on the biochar retort. |
 |
| Dinner (stir-fried veggies and rice) cooked on the biochar retort in the backyard in Northcote. |


No comments:
Post a Comment